What you will need:
- a lot of cardboard
- a ton of tape
- paint
- marker
- tape measure
- box cutter/knife/scissors
… and time!
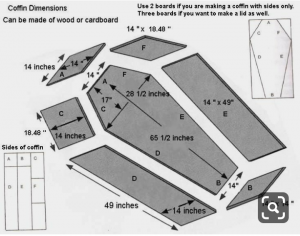
1.) I found this blueprint on Pinterest, and I followed the measurements. I used a tape measure, and traced lines as straight as I could on the cardboard box. Then I used the box cutter knife to cut the pieces out. I wanted to make a door to I cut out two of the hexagon-like, coffin shapes. You should end up with 7 or 8 total pieces for your cardboard casket.
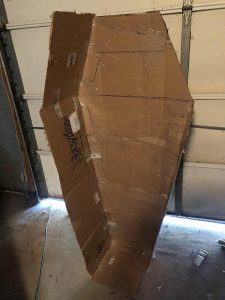
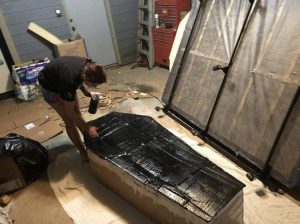
2.) At first, I used tape and other pieces of cardboard to sturdy and strengthen the back of it. Once that piece was ready, I began attaching the sides. I really helped to use pieces of bent cardboard as a brace, connecting the pieces together. It helped make everything secure and strong. Use as much tape as you need!!
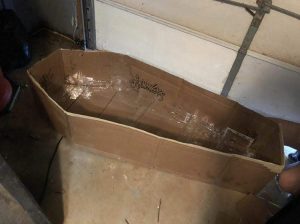
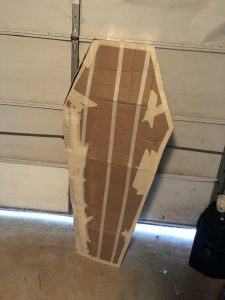
3.) This is what it looks like with all of the sides taped down nice, and secured. We went around the edges and taped them too, to make everything look smooth. If you like the jagged look then, you can skip that part. You just want to double and triple check that this thing is going to last!
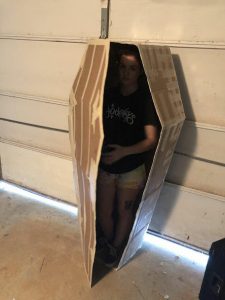
4.) Now, if want a door, we used crutches(we made those things for putting the side pieces together)on both sides of the door for maximum protection. As you can see, we also used a ridiculous amount of tape to hold those pieces in place. We were on our third roll of tape at this point, and very excited to see that it worked!!
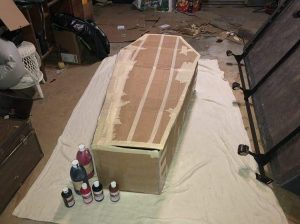
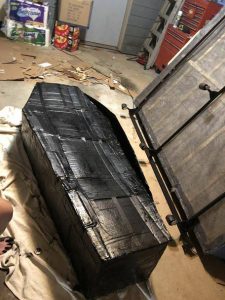
5.) Congratulations!! Now we are officially done with the massive taping section. We have moved on to the messiest portion; painting! I used a old blanket as a drop cloth so I wouldn’t get any acrylic paint on the floor. Fair warning, it wont come out of your clothes, but it will come off your skin with soap and water, and some surfaces it can be peeled or scrubbed off. I used black, dark brown, light brown, and red to paint my coffin. Dive right on in! We started the process by just pouring the black directly on top.
-I didn’t have any big paint brushes, so we worked at it with our hands!
6.) After you finished painting it the base color, let it dry for a few hours before you start working on the details.
…A Couple Hours Later…
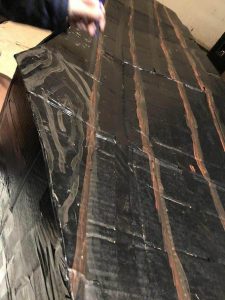
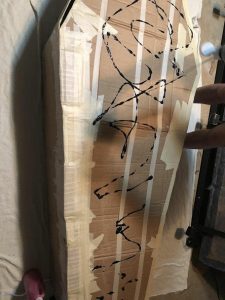
7.) We wanted our casket to look as if it was made of wood so we painted lines creating the illusion of slats. Then, I started with my dark brown and began painting swirled patterns.(This time with a paintbrush)
-We went back and added the light brown color around the dark brown to create a highlight and shadow effect. I also went through with the dark brown a second time to blend the two colors better.
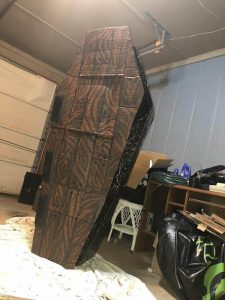
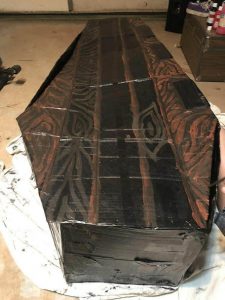
8.) I outlined the slats in black, left the crutches black, and added some detail of nails in black. We only felt up to painting the front of the door, but this is what it looks like. I think painting the cardboard to look like wood makes it look better because the cardboard already has lines and dips in it that can’t be changed, and it gives it a more natural look.

9.) To finish it off, we splattered some red paint on it to make it look more scary. Then we left it out to dry for a day or two. After that it’s ready to be apart of your decorations!
If you try this creation, post it on your social media with the #mycoffincreation ! I can’t wait to see if any of you were inspired by this tutorial. Stay posted, on more to come. Happy Halloween!